
Replacing the ball joint on a Fiat Coupe involves several steps and requires specific tools and components. click here for more details on the download manual…..
- Fiat Coupe 20v Turbo Tour – Restoration Part 1 In this video i’ll be covering my recent purchase of a Fiat Coupe 20v Turbo in Scotts Green. It needs a bit of work but i’ll be …
- Fiat Coupé 20v Turbo Gtx30-76 (1,2 bar) Prove durante la mappatura con centralina Autronic.
Below is a detailed guide on how to perform the replacement, including descriptions of every component involved in the process:
### Tools and Components Needed
**Tools:**
1. **Jack and Jack Stands:** To lift and secure the vehicle safely.
2. **Lug Wrench:** To remove the wheel.
3. **Socket Set:** Various sizes are needed; typically, 10mm to 19mm.
4. **Wrench Set:** For nuts and bolts.
5. **Ball Joint Separator (Fork Tool):** To separate the ball joint from the control arm.
6. **Hammer:** To help with separation if needed.
7. **Torque Wrench:** To ensure proper torque specifications when reassembling.
8. **Pliers:** For various tasks, including removing clips.
9. **Grease Gun:** If the new ball joint requires lubrication.
10. **Safety Glasses and Gloves:** For personal protection.
**Components:**
1. **New ball Joint:** The replacement part that connects the control arm and the steering knuckle.
2. **Cotter Pin:** A small pin used to secure the castle nut on the ball joint.
3. **Castle Nut:** The nut that secures the ball joint to the steering knuckle.
4. **Control Arm:** The component that holds the ball joint and connects to the chassis.
5. **Steering Knuckle:** The part that houses the wheel hub and supports the ball joint.
### Step-by-Step Replacement Process
#### 1. Preparation
– **Safety First:** Ensure the vehicle is parked on a flat surface, engage the handbrake, and wear safety glasses and gloves.
– **Loosen Lug Nuts:** Using a lug wrench, slightly loosen the lug nuts on the wheel where you will be replacing the ball joint, but do not remove them yet.
#### 2. Lifting the Vehicle
– **Jack Up the Vehicle:** Use a jack to lift the front of the car and place jack stands under the vehicle for safety.
– **Remove the Wheel:** Take off the lug nuts completely and remove the wheel to expose the suspension components.
#### 3. Accessing the ball Joint
– **Locate the ball Joint:** The ball joint is typically located at the bottom of the steering knuckle, connecting to the control arm.
– **Remove Necessary Components:** Depending on the model, you may need to remove the brake caliper and rotor for better access. Use a socket set to remove the caliper bolts, and hang the caliper with a bungee cord (never let it hang by the brake line).
#### 4. Removing the Old ball Joint
– **Unfasten the Castle Nut:** Use a socket to remove the castle nut securing the ball joint to the steering knuckle. If it’s rusted or stuck, you may need to use penetrating oil and some force.
– **Separate the ball Joint:** Use a ball joint separator tool (fork) to create space between the ball joint and the steering knuckle. You may need to tap it with a hammer gently to help it loosen.
– **Remove the ball Joint:** Once separated, pull the ball joint out from the control arm.
#### 5. Installing the New ball Joint
– **Prepare the New ball Joint:** Compare the old ball joint with the new one to ensure they are the same.
– **Insert the New ball Joint:** Push the new ball joint into the control arm. It should fit snugly.
– **Secure with Castle Nut:** Thread the castle nut onto the new ball joint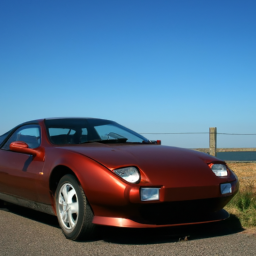 and tighten it until it is snug. Do not fully tighten yet.
– **Insert Cotter Pin:** Insert the cotter pin through the hole in the castle nut and bend the ends to secure it.
#### 6. Reassembly
– **Reattach the Steering Knuckle:** If it was removed, align the steering knuckle with the ball joint and press it back into place.
– **Tighten the Castle Nut:** Use a torque wrench to tighten the castle nut to the manufacturer’s specifications.
– **Reinstall the Brake Components:** If you removed the brake caliper and rotor, reinstall them.
– **Reattach the Wheel:** Place the wheel back onto the hub and hand-tighten the lug nuts.
#### 7. Final Steps
– **Lower the Vehicle:** Carefully remove the jack stands and lower the vehicle back to the ground using the jack.
– **Tighten Lug Nuts:** Use the lug wrench to tighten the lug nuts in a star pattern to ensure even pressure.
– **Test Drive:** After everything is reassembled, take the vehicle for a test drive to ensure that everything is functioning properly.
### Important Considerations
– **Alignment:** After replacing a ball joint, it’s advisable to have a wheel alignment performed, as the suspension geometry may have changed.
– **Check for Wear:** While you’re in the suspension, check other components for wear and replace as necessary.
This guide provides a comprehensive overview of the ball joint replacement process on a Fiat Coupe. Always refer to the vehicle’s service manual for specific torque specifications and procedures related to your particular model year.
The crankshaft pulley, also known as the harmonic balancer, is a vital component of an internal combustion engine. Positioned at the front of the crankshaft, this pulley serves multiple functions that are essential for the engine’s performance and longevity. Primarily, it is responsible for transferring rotational energy from the crankshaft to various accessories, such as the alternator, power steering pump, water pump, and air conditioning compressor. This transfer is crucial for the operation of these components, which are integral to the vehicle’s functionality and comfort.
The crankshaft pulley is typically made from durable materials like cast iron or aluminum, designed to withstand the high levels of stress and vibration generated during engine operation. Often, it features a rubber or elastomeric layer that helps dampen vibrations, reducing the risk of harmonic resonance that could lead to engine damage. This damping function is particularly important in high-performance engines, where vibrations can be more pronounced.
In addition to its mechanical functions, the crankshaft pulley often has timing marks or grooves that assist in aligning the timing belt or chain, ensuring that the engine’s valves and pistons operate in sync. Overall, the crankshaft pulley is a small yet crucial component that plays a significant role in the overall efficiency, performance, and smooth operation of an engine. Regular inspection and maintenance of the crankshaft pulley can prevent potential issues that could lead to more significant engine problems in the future.