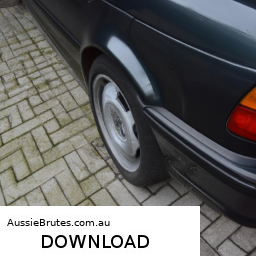
Replacing the CV (Constant Velocity) joint on a BMW 528i E39 5 Touring involves several steps. click here for more details on the download manual…..
- This OEM+ Mod Made My Old BMW Twice as Fun to Drive – E39 530i Touring – Project Rottweil PT9 Say goodbye to the automatic transmission, and say Hallo to the 6-speed manual! In this episode, we are making a car that BMW …
- BMW e39 528 OEM parts refit Matt has sourced an original headhunt, CD changer and other parts to bring the 528 back to stock. A nice easy refit…….erm……
Below is a detailed guide on how to perform this procedure, including necessary tools and descriptions.
### Tools and Equipment Needed:
– **Jack and Jack Stands**: To lift the vehicle securely.
– **Lug Wrench**: For removing wheel nuts.
– **Socket Set**: Including metric sockets (10mm, 13mm, 17mm, 19mm, etc.) for various bolts.
– **Torque Wrench**: To ensure bolts are tightened to manufacturer specifications.
– **Pry Bar**: For applying leverage to remove stubborn components.
– **Hammer**: For tapping components into place or loosening them if needed.
– **CV Joint Boot Clamp Tool**: For securing new boot clamps.
– **Grease**: CV joint grease for lubrication during assembly.
– **Flathead and Phillips Screwdrivers**: For removing clips and securing components.
– **CV Joint Puller Tool**: Useful for removing the CV joint from the axle (optional).
– **Brake Cleaner**: To clean parts before reassembly.
– **Safety Glasses and Gloves**: For personal protection.
### Step-by-Step Replacement Process:
– **Preparation**:
– Park the vehicle on a flat surface and engage the parking brake.
– Gather all necessary tools and materials before starting.
– **Lift the Vehicle**:
– Use the jack to raise the front of the vehicle.
– Securely place jack stands under the vehicle to ensure safety.
– **Remove the Wheel**:
– Use the lug wrench to loosen and remove the wheel nuts.
– Take off the front wheel to access the CV joint and axle.
– **Remove the Brake Caliper and Rotor**:
– Remove the caliper bolts using a socket wrench (typically 13mm or 15mm).
– hang the caliper using a wire or bungee cord (do not let it dangle from the brake line).
– Remove the brake rotor by unscrewing any retaining screws and pulling it off the hub.
– **Disconnect the Axle Nut**:
– Remove the axle nut, which is usually a large nut (typically 30mm).
– You may need a breaker bar for added torque to loosen it.
– **Remove the Lower Control Arm**:
– Disconnect the lower control arm from the steering knuckle (usually held by a bolt).
– You may need to use a pry bar to separate the components.
– **Remove the CV Joint**:
– If the CV joint is still attached, use a CV joint puller tool to carefully slide it off the axle.
– If necessary, tap the outer CV joint with a hammer to loosen it.
– **Inspect the Old CV Joint**:
– Once removed, inspect the CV joint for wear, damage, or excessive play. This will confirm the need for replacement.
– **Install the New CV Joint**:
– Apply a generous amount of CV joint grease to the new CV joint and the boot.
– Slide the new CV joint onto the axle, ensuring it’s seated properly.
– **Secure the CV Joint Boot**:
– Slide the boot onto the CV joint and use the CV joint boot clamp tool to secure the boot in place.
– Ensure there are no kinks or twists in the boot.
– **Reassemble the Lower Control Arm**:
– Reattach the lower control arm to the steering knuckle and tighten the bolts to the recommended torque specifications.
– **Reattach the Axle Nut**:
– Thread the axle nut back onto the axle and tighten it to the manufacturer’s specifications.
– **Reinstall the Brake Rotor and Caliper**:
– Position the brake rotor back onto the hub and secure it.
– Reattach the brake caliper and tighten the mounting bolts.
– **Reinstall the Wheel**:
– Place the wheel back onto the hub and hand-tighten the lug nuts.
– Lower the vehicle back to the ground and use the torque wrench to tighten the lug nuts to the specified torque.
– **Final Checks**:
– Ensure all components are secure and properly tightened.
– Check for any leaks or issues with the CV joint boot.
– **Test Drive**:
– Start the vehicle and take it for a short test drive to ensure everything is functioning correctly.
### Safety Considerations:
– Always wear safety glasses and gloves during the procedure.
– Ensure the vehicle is securely lifted and supported by jack stands before working underneath.
– Dispose of old parts, grease, and fluids according to local regulations.
Following these steps should allow you to successfully replace the CV joint on your BMW 528i E39 5 Touring. Always refer to the vehicle’s service manual for specific torque values and additional guidance.
A wheel speed sensor is a crucial component in modern vehicles, playing a vital role in various systems that enhance safety, performance, and efficiency. typically located near the wheel hub, this sensor is designed to monitor the rotational speed of the wheel. It employs either a magnetic or optical mechanism to detect the wheel’s motion, generating electrical signals sent to the vehicle’s onboard computer or electronic control unit (ECU).
One of the primary functions of the wheel speed sensor is its integration with the Anti-lock Braking System (ABS). During braking, the sensor continuously measures the wheel’s speed to determine if any wheel is locking up. If a lock-up is detected, the ABS modulates brake pressure to that wheel, preventing skidding and maintaining vehicle control. This function significantly enhances safety, particularly in slippery conditions.
Additionally, wheel speed sensors contribute to traction control and stability systems. By providing real-time data on wheel speed, these sensors help the vehicle’s systems adjust Engine power and brake force to prevent wheel spin and loss of traction, ensuring better handling and stability during acceleration and cornering.
Moreover, modern vehicles often use wheel speed sensors for advanced driver-assistance systems (ADAS), including adaptive cruise control and collision avoidance. Overall, the wheel speed sensor is an integral part of a vehicle’s safety and performance architecture, ensuring optimal operation under various driving conditions.