
Replacing the pressure plate on a Komatsu D65EX-12 dozer involves several detailed steps that require careful attention to safety and proper procedure. click here for more details on the download manual…..
- Komatsu D65EX-18 and D85-18 component location An inside look at the Komatsu D65-18 and D85-18 component location. Learn more about the D65EX-18: https://bit.ly/2AKy92T …
- How to change transmission oil bulldozer d65ex komatsu #mechanical
Below is a comprehensive guide to help you understand the components involved and the steps needed to complete the replacement.
### Components Involved
1. **Pressure Plate**: This component holds the clutch disc against the flywheel, transmitting power from the engine to the transmission.
2. **Clutch Disc**: Sits between the pressure plate and flywheel, allowing for smooth engagement and disengagement of the engine power.
3. **Flywheel**: Attached to the engine, the flywheel provides a surface for the clutch disc to engage.
4. **Release Bearing**: Assists in disengaging the clutch when the operator presses the clutch pedal.
5. **Clutch Fork**: Transfers the motion from the clutch pedal to the release bearing.
6. **Bolts and Fasteners**: Secure the pressure plate to the flywheel and the clutch assembly.
7. **Alignment Tool**: A tool used to keep the clutch disc centered during installation.
### Tools Required
– Socket set (metric)
– Torque wrench
– Screwdrivers
– Clutch alignment tool
– Pry bar
– Jack and jack stands
– Safety equipment (gloves, goggles, etc.)
– Service manual for specific torque specifications
### steps for Pressure Plate Replacement
#### 1. Preparation and Safety
– **Safety First**: Ensure the dozer is parked on a flat surface, and engage the parking brake. Use wheel chocks to prevent movement.
– **Disconnect Battery**: Remove the negative terminal of the battery to prevent any electrical accidents.
#### 2. Accessing the Clutch Assembly
– **Remove the Transmission access Cover**: Depending on the model, you may need to remove a cover to access the clutch assembly. This may involve removing nuts/bolts using a socket set.
– **Disconnect any Obstructions**: Remove any components that block access to the clutch, such as hydraulic lines or other engine components.
#### 3. Removing the Old Pressure Plate
– **Mark the Position**: Before removing, mark the position of the pressure plate and flywheel for easier alignment during reinstallation.
– **Unbolt the Pressure Plate**: Using the socket set, remove the bolts securing the pressure plate to the flywheel. Keep track of these bolts as they will be reused.
– **Remove the Clutch Disc**: Once the pressure plate is unbolted, carefully slide it off along with the clutch disc. Take note of how the disc is oriented for reinstalling.
– **Inspect the Flywheel**: Check the flywheel for any signs of wear or damage. If necessary, it may need resurfacing or replacement.
#### 4. Installing the New Pressure Plate
– **Position the Clutch Disc**: Use the alignment tool to center the new clutch disc on the flywheel. This is critical for proper engagement.
– **Install the New Pressure Plate**: Align the pressure plate with the marks made earlier. Carefully slide it over the clutch disc.
– **Secure the Pressure Plate**: 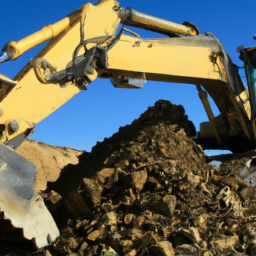 Hand-tighten the bolts initially, then use a torque wrench to secure them to the specifications provided in the service manual. Ensure the pressure plate is evenly tightened to avoid warping.
#### 5. Reassembling the Components
– **Reinstall the Transmission access Cover**: Secure it back in place.
– **Reconnect Any Removed Components**: Reattach any hydraulic lines or other components that were removed to access the clutch assembly.
– **Reconnect the Battery**: Reconnect the negative terminal and ensure all electrical connections are secure.
#### 6. Testing
– **Start the Dozer**: After reassembly, start the engine and let it idle.
– **Test the Clutch**: Press the clutch pedal to ensure it engages and disengages smoothly. Listen for any abnormal noises.
#### 7. Final Checks
– **Inspect for Leaks**: Check around the transmission and clutch area for any signs of fluid leaks.
– **Perform a Road Test**: If possible, take the dozer for a short drive to ensure everything functions correctly.
### Conclusion
Replacing the pressure plate on a Komatsu D65EX-12 dozer is a meticulous process that requires attention to detail and adherence to safety procedures. Always refer to the manufacturer’s service manual for specific torque specifications and other details. If you’re unsure about any step, consulting a professional mechanic is recommended.
A tie rod is a crucial component of a vehicle’s steering mechanism, playing an essential role in the overall handling and stability of the vehicle. It connects the steering gear or rack to the steering knuckle, which is part of the wheel assembly. Typically found in both rack-and-pinion and recirculating ball steering systems, tie rods are vital for transferring the driver’s steering input to the wheels, enabling them to turn in unison with the steering wheel.
Tie rods come in two main types: inner and outer. The inner tie rod connects directly to the steering rack, while the outer tie rod connects to the steering knuckle. These components work together to ensure that when the driver turns the steering wheel, the wheels respond accurately and promptly. The tie rods are adjustable, allowing for alignment adjustments to ensure proper wheel orientation and to prevent uneven tire wear.
Over time, tie rods can wear out due to constant movement and exposure to road conditions. Symptoms of failing tie rods may include loose steering, knocking noises, or uneven tire wear. regular inspection is crucial, as a failing tie rod can lead to compromised steering control and increased risk of accidents. Therefore, maintaining the tie rod assembly is essential for safe vehicle operation and overall driving experience.