Replacing a shift solenoid on a Datsun A10 or A12 engine involves a series of steps that require careful attention to detail, proper tools, and safety precautions. click here for more details on the download manual…..
- Datsun GX
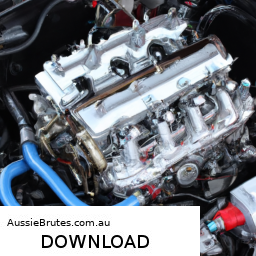
- Datsun 1200 A12 Race Motor Datsun A12 race motor.
Below is a detailed guide on how to perform this replacement.
### Tools and Components Needed:
1. **Tools:**
– Socket set (including metric sizes)
– Wrench set
– Screwdrivers (flathead and Phillips)
– Pliers
– Torque wrench
– Wire cutters/strippers
– Electrical tape
– Multimeter (for testing)
– Oil catch pan (if necessary)
– Safety goggles and gloves
2. **Replacement Parts:**
– New shift solenoid (specific to Datsun A10/A12)
– New transmission fluid (if needed)
– Gasket or O-ring (if applicable for solenoid)
### Step-by-Step Replacement Process:
#### Step 1: Prepare the Vehicle
– **Safety First:** Park the vehicle on a flat surface and engage the parking brake. If working on an automatic transmission, ensure the engine is off and cool.
– **Disconnect the Battery:** Always disconnect the negative terminal of the battery to prevent any electrical shorts.
#### Step 2: Access the Transmission
– **Lift the Vehicle:** Use a jack to lift the front or rear of the vehicle to access the transmission. Secure it with jack stands.
– **Remove Underbody Panels:** If your Datsun has underbody panels, remove them to gain access to the transmission.
#### Step 3: Locate the Shift Solenoid
– The shift solenoid is typically located on or inside the transmission. Refer to your service manual for the exact location. It may be mounted on the exterior of the transmission or may require removal of the valve body.
#### Step 4: Remove the Old Shift Solenoid
1. **Disconnect Wiring Harness:** Carefully unplug the electrical connector from the solenoid. Use a flathead screwdriver to gently pry it free if it’s stuck.
2. **Remove Bolts/Retaining Clips:** Use the appropriate socket or wrench to remove any bolts or clips securing the solenoid to the transmission. Keep these parts in a safe place for reinstallation.
3. **Remove the Solenoid:** Gently pull the solenoid out of its housing. If it’s stuck, wiggle it slightly to free it, but avoid using excessive force.
#### Step 5: Install the New Shift Solenoid
1. **Prepare the New Solenoid:** If the new solenoid comes with an O-ring or gasket, ensure it is installed correctly on the new part.
2. **Insert the New Solenoid:** Carefully slide the new solenoid into place. Ensure it is seated properly in its housing.
3. **Secure the Solenoid:** Reinstall the bolts or clips that hold the solenoid in place. Use a torque wrench to tighten them to the manufacturer’s specifications (consult the service manual for torque values).
4. **Reconnect the Wiring Harness:** Plug the electrical connector back onto the solenoid, ensuring it clicks into place securely.
#### Step 6: Reassemble and Test
1. **Reinstall Underbody Panels:** If you removed any underbody panels, reattach them now.
2. **Lower the Vehicle:** Carefully remove the jack stands and lower the vehicle back to the ground.
3. **Reconnect the Battery:** Reattach the negative terminal of the battery.
4. **Refill Transmission Fluid (if necessary):** Check the transmission fluid level. If you drained any fluid during the process, refill it with the appropriate type of transmission fluid for your Datsun.
5. **Start the Engine:** Start the vehicle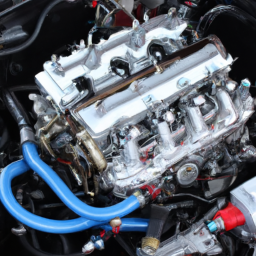 and allow it to idle. Shift through the transmission gears to ensure the new solenoid is functioning properly. Check for any leaks around the solenoid area.
6. **Test Drive:** Take the vehicle for a test drive to ensure that the transmission shifts smoothly and that the solenoid is operating correctly.
### Final Notes:
– If you encounter any issues during the replacement or if the new solenoid does not seem to resolve shifting problems, it may be advisable to consult a professional mechanic.
– Always refer to the specific service manual for your Datsun A10 or A12 for detailed specifications, torque values, and any unique procedures that may apply.
The oil pressure sender, also known as the oil pressure sensor or oil pressure switch, is a critical component in an automobile’s engine management system. Its primary function is to monitor the oil pressure within the engine and relay this information to the vehicle’s onboard computer or directly to the oil pressure gauge on the dashboard. Proper oil pressure is essential for the lubrication of engine components, as it ensures that the oil is circulated effectively throughout the engine, reducing friction and preventing overheating.
Typically located near the oil filter or within the engine block, the oil pressure sender is equipped with a sensing element that detects the pressure of the oil. When the oil pressure is within normal operating range, the sender transmits a corresponding signal to the engine control unit (ECU) or the dashboard gauge, indicating that the engine is operating correctly. Conversely, if the oil pressure drops below a safe threshold, the sender will trigger a warning light or alert the driver through the gauge, potentially preventing severe engine damage due to insufficient lubrication.
Oil pressure senders come in various types, including mechanical and electronic versions. Mechanical senders utilize a diaphragm or Bourdon tube to measure pressure, while electronic senders use strain gauges or piezoelectric sensors for more accurate readings. Regular inspection of the oil pressure sender is vital, as a malfunction can lead to inaccurate readings, resulting in a false sense of security or alarm regarding engine health. Proper functioning of this component is crucial for maintaining optimal engine performance and longevity.