Certainly! click here for more details on the download manual…..
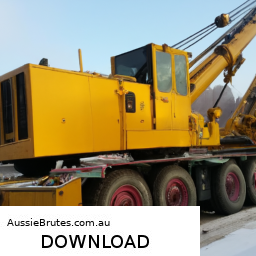
- PL3005 VOLVO – The winch from the front
- laufuman ( 2007 crude oil pipeline project….) post some of video to someone like to review.
Suspension alignment is an important process that ensures your vehicle’s wheels are positioned correctly in relation to each other and the road. Proper alignment helps with handling, tire wear, and overall safety. Here’s a simple guide to understanding suspension alignment for the Volvo PL4611 Pipelayer:
### What is Suspension Alignment?
Suspension alignment refers to adjusting the angles of the wheels so that they are perpendicular to the ground and parallel to each other. This ensures that the vehicle drives straight and the tires wear evenly.
### Key Terms to Know
1. **Camber**: The angle of the wheels when viewed from the front. If the top of the wheel is tilted outward, that’s positive camber; if it’s tilted inward, that’s negative camber.
2. **Toe**: The angle of the wheels when viewed from above. If the front of the wheels is closer together than the back, that’s called toe-in; if the back is closer, that’s toe-out.
3. **Caster**: The angle of the steering axis when viewed from the side. A positive caster angle helps with straight-line stability.
### Steps for Suspension Alignment
1. **Preparation**:
– **Check Tire Condition**: Ensure that all tires are properly inflated and in good condition.
– **Clear the Area**: Make sure you have enough space to work around the vehicle.
2. **Gather Tools**:
– A basic alignment tool (can be a digital tool or a simple alignment gauge)
– A wrench set (for any adjustments)
– A level (to check for level ground)
3. **Lift the Vehicle**:
– Use a jack to raise the vehicle off the ground. Make sure it’s secure with jack stands.
4. **Inspect the Suspension**:
– Look for any worn or damaged parts in the suspension system, such as bushings, ball joints, and tie rods. replace any damaged parts before proceeding.
5. **Check Current Alignment**:
– Use your alignment tool to measure the current camber, toe, and caster. Note these measurements for reference.
6. **Adjusting Camber**:
– If the camber is out of spec, adjust the camber bolts or camber plates (if equipped). This may involve loosening bolts and repositioning components. Aim for a camber angle that matches the manufacturer’s specifications.
7. **Adjusting Toe**:
– For toe adjustments, you typically need to adjust the tie rods. Loosen the tie rod lock nuts and turn the tie rods to achieve the desired toe angle. Again, refer to the specifications for the correct amount of toe.
8. **Adjusting Caster**:
– Caster adjustments might be more complicated and may require special tools or equipment. If it’s necessary, consult a professional or the manual for specific adjustment procedures.
9. **Recheck Measurements**:
– After making adjustments, use the alignment tool again to check the new measurements. They should now be within the specified range.
10. **Test Drive**:
– After everything is adjusted, take the vehicle for a short test drive. Pay attention to how it 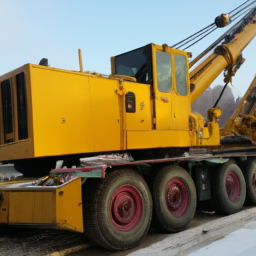 handles. If it pulls to one side or feels unstable, you may need to make further adjustments.
### Conclusion
Suspension alignment can be a complex task, but by following these basic steps and understanding the key terms, you can get a good start on the process for your Volvo PL4611 Pipelayer. If you’re unsure or uncomfortable making these adjustments, it’s always a good idea to consult a professional mechanic or take your vehicle to an alignment shop. Proper alignment will enhance your vehicle’s performance and extend the life of your tires!
A catalytic converter gasket is a crucial component in the exhaust system of an internal combustion engine vehicle, specifically designed to provide a seal between the catalytic converter and the exhaust manifold or the exhaust pipe. The primary purpose of the gasket is to prevent exhaust gases from leaking out of the joint where the catalytic converter connects to the rest of the exhaust system. This is essential for maintaining the efficiency of the catalytic converter and ensuring that the vehicle adheres to emissions regulations.
The gasket is typically made from materials that can withstand high temperatures and corrosive environments, such as rubber, silicone, or metal composites. Over time, due to heat cycling, vibrations, and exposure to exhaust gases, the gasket can wear out, crack, or become brittle. A failing gasket may result in exhaust leaks, which can lead to a decrease in engine performance, increased emissions, and a potential check engine light activation.
Replacing a worn or damaged catalytic converter gasket is crucial for optimal vehicle performance and environmental compliance. The process usually involves disconnecting the catalytic converter from the exhaust system, removing the old gasket, cleaning the mating surfaces, and installing a new gasket before reassembling the components. Regular maintenance and inspections can help ensure that the gasket remains in good condition, contributing to the overall health of the vehicle’s exhaust system.